Install RyvieOS yourself, for free
Download RyvieOS for free and follow this step-by-step guide to install your personal cloud on the PC of your choice, virtual machine or physical server.
One-command express install
Already have a Linux machine? Install RyvieOS directly, without an ISO or USB drive. Copy and paste this command into your terminal:
curl -fsSL https://raw.githubusercontent.com/maisonnavejul/RyvieOS/main/install.sh | bashThe script downloads and configures RyvieOS automatically. For a new machine without an OS, use the ISO installation below instead.
Retrieve your setup key
Once the installation is complete, retrieve the setup key generated for your server. Ryvie Connect will ask for it to link your computer to your Ryvie:
echo "$(grep '^NETBIRD_SETUP_KEY=' /data/config/netbird/.env | cut -d= -f2-)-$(jq -r '.received.backendHost' /data/config/netbird/netbird-data.json)"The command prints a single line: copy it in full and paste it into Ryvie Connect. Keep this key private — it grants access to your server.
Prerequisites: Download the RyvieOS ISO
Before you start, download the RyvieOS ISO image. This image contains everything you need to install your personal cloud.
💡 Note: The downloaded file is a .iso image (~1 GB). You'll need it for installation on a VM or USB drive.
Installation on a Virtual Machine
Ideal for testing RyvieOS or if you don't have a dedicated server.
Install VirtualBox
Download and install VirtualBox on your computer. It's a free program that lets you create virtual machines.
Create a new virtual machine
Open VirtualBox and click New to create a virtual machine. Fill in the following fields:
- Name: give your VM a name (e.g. ryvieos)
- ISO Image: select the ryvieos-0.0.13.iso file you downloaded earlier
- Type: Linux
- Version: Debian (64-bit)
- Check "Skip Unattended Installation" to keep control over the installation
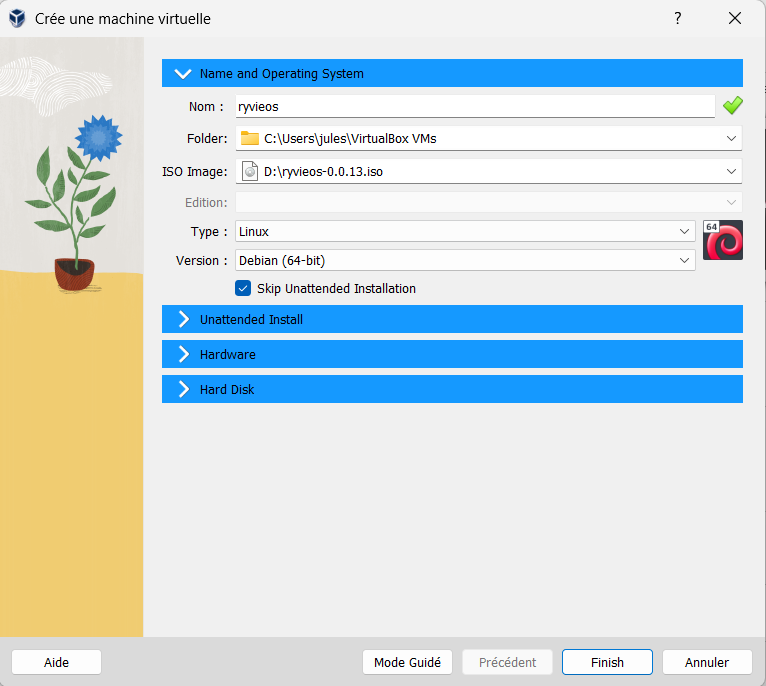
Configure hardware resources
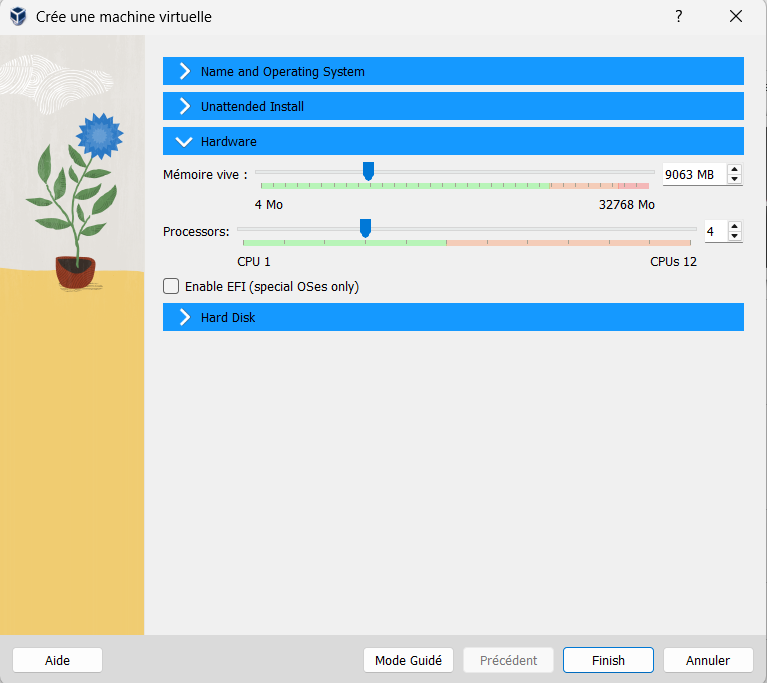
Click the Hardware section and assign enough resources to your VM:
8 GB
Minimum RAM
4
Minimum CPUs
> 50 GB
Minimum storage
Move the Base Memory slider to at least 8192 MB (8 GB) and set the number of Processors to at least 4.
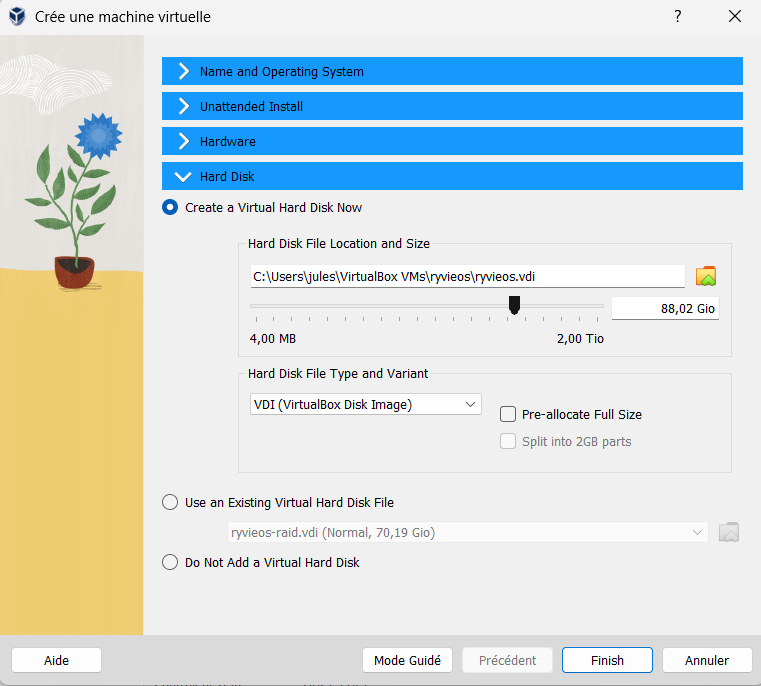
Then click the Hard Disk section. Select "Create a Virtual Hard Disk Now" and assign at least 50 GB of disk space. The more you assign, the more storage you'll have available for your files.
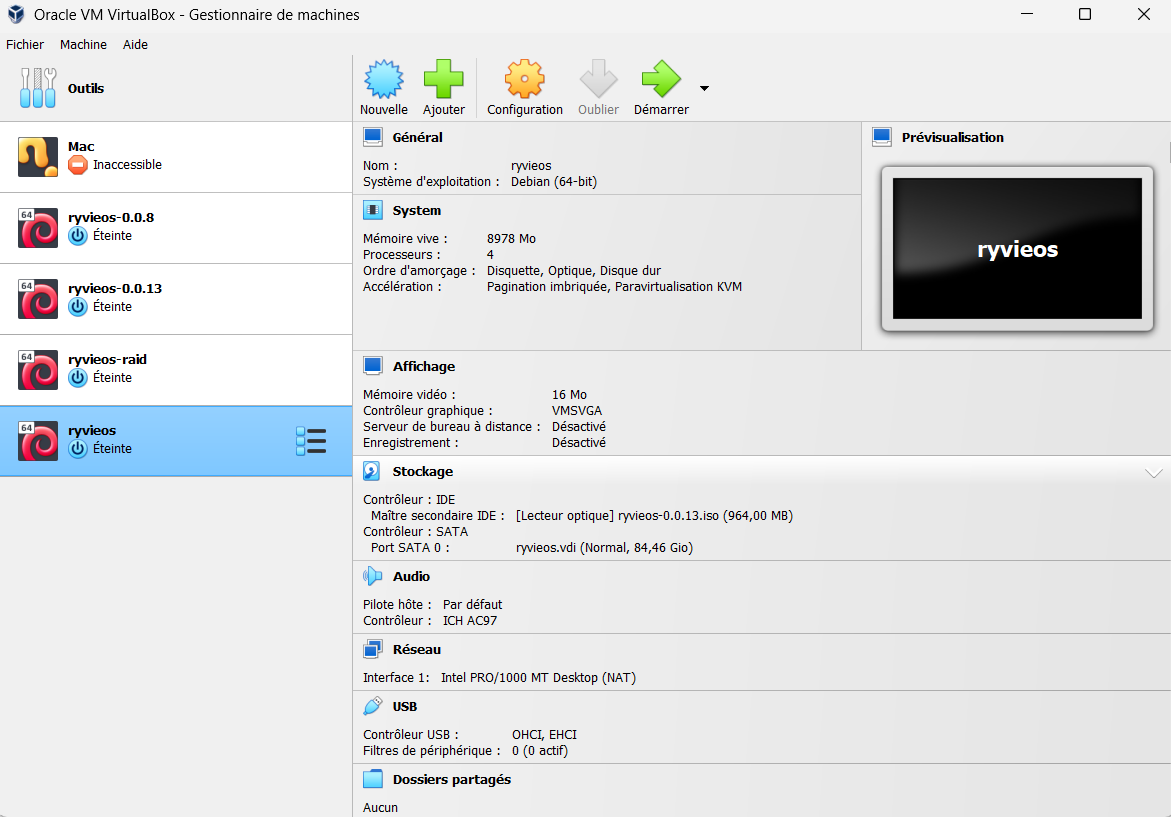
Click Finish to create the virtual machine. You'll see a summary of the configuration:
Configure the network in Bridge mode
Before starting the VM, you need to configure the network so your Ryvie is reachable from your other devices.
Select your VM in the list, then click Settings (the gear icon). In the left-hand menu, click Network. Change the Attached to setting from "NAT" to Bridged Adapter.
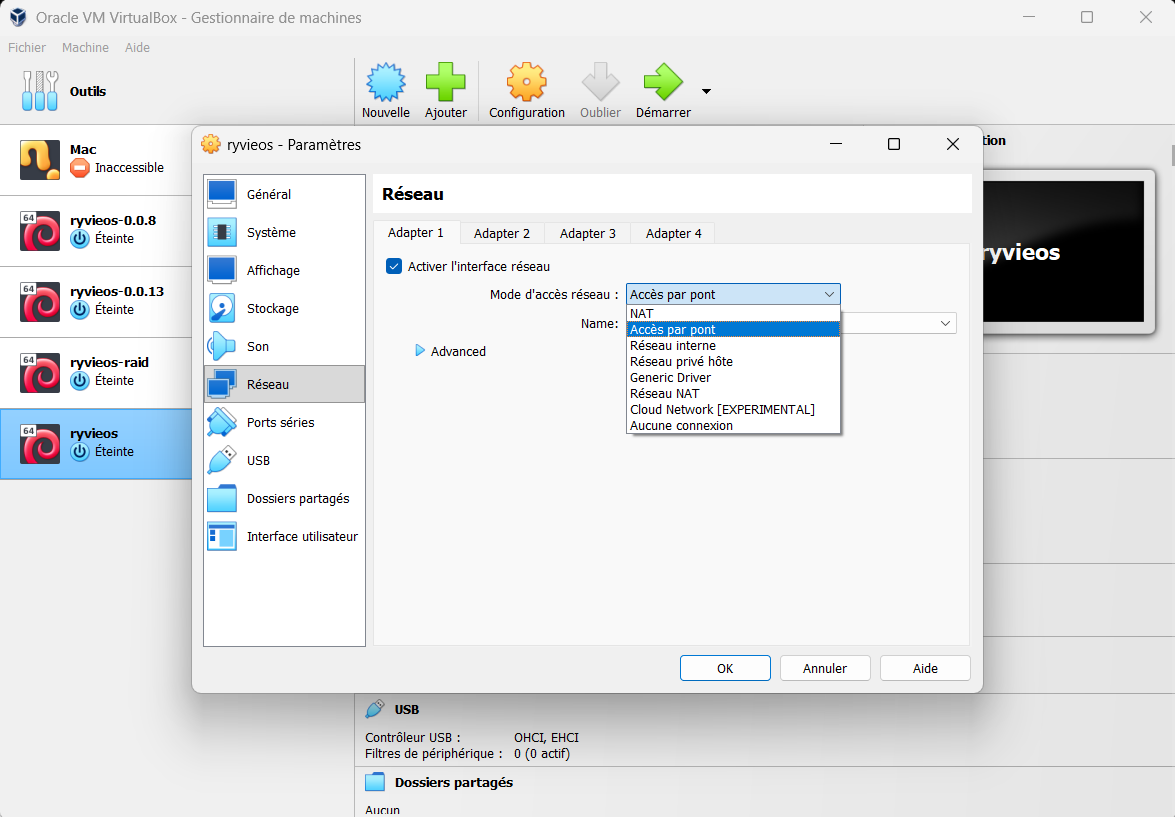
💡 Why Bridge mode? This mode lets the VM get its own IP address on your local network, making your Ryvie accessible from all your devices (PC, phone, tablet...).
Start the VM and choose the installation type
Click Start to launch the virtual machine. After a few seconds, the RyvieOS installation screen appears with two options:
- Install RyvieOS (Recommended) — text-mode installation, faster
- Install RyvieOS (Graphical) — installation with a graphical interface
Select Install RyvieOS (Recommended) and press Enter.
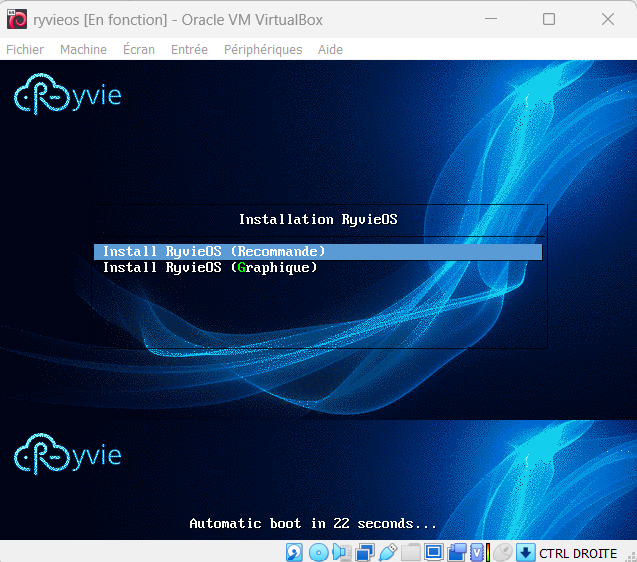
💡 The base installation (partitioning, file system, GRUB) starts automatically. Wait until the system asks you to choose a disk.
Select the installation disk
At the end of the base installation, the system asks which disk to install the GRUB bootloader on. You'll see a screen with two options:
- 1: Manual device selection
- 2: /dev/sda — your VM's main hard disk
Type 2 then press Enter to select the main disk.
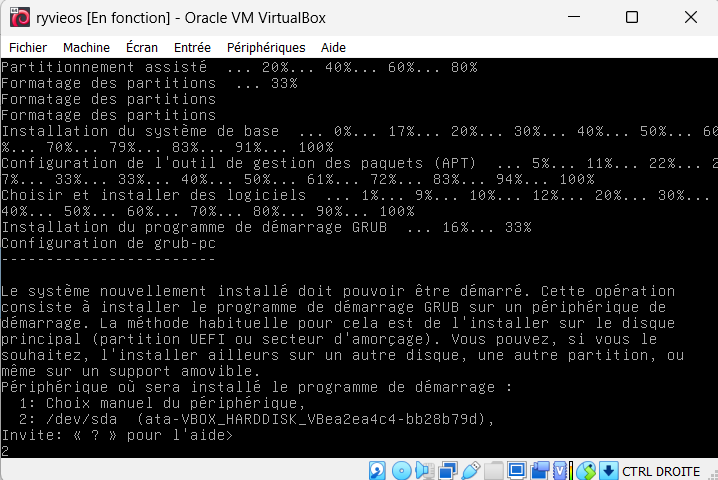
The rest of the installation will continue. Once finished, close the VM window (click the cross) and select "Power off the machine" when VirtualBox asks.
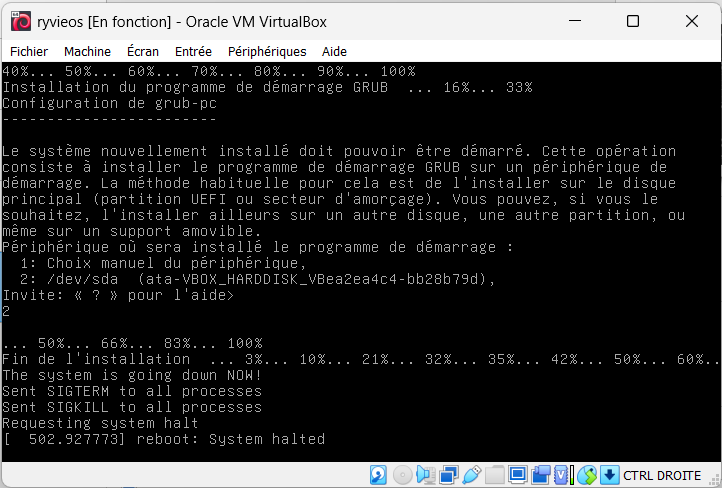
Automatic RyvieOS installation
Restart the VM by clicking Start . The system will reboot and automatically run the RyvieOS installation script. You'll see the Ryvie OS logo appear in the terminal, followed by the various installation steps:
- Creating storage subvolumes (apps, config, docker, logs, images...)
- Checking system requirements
- Installing Ryvie components
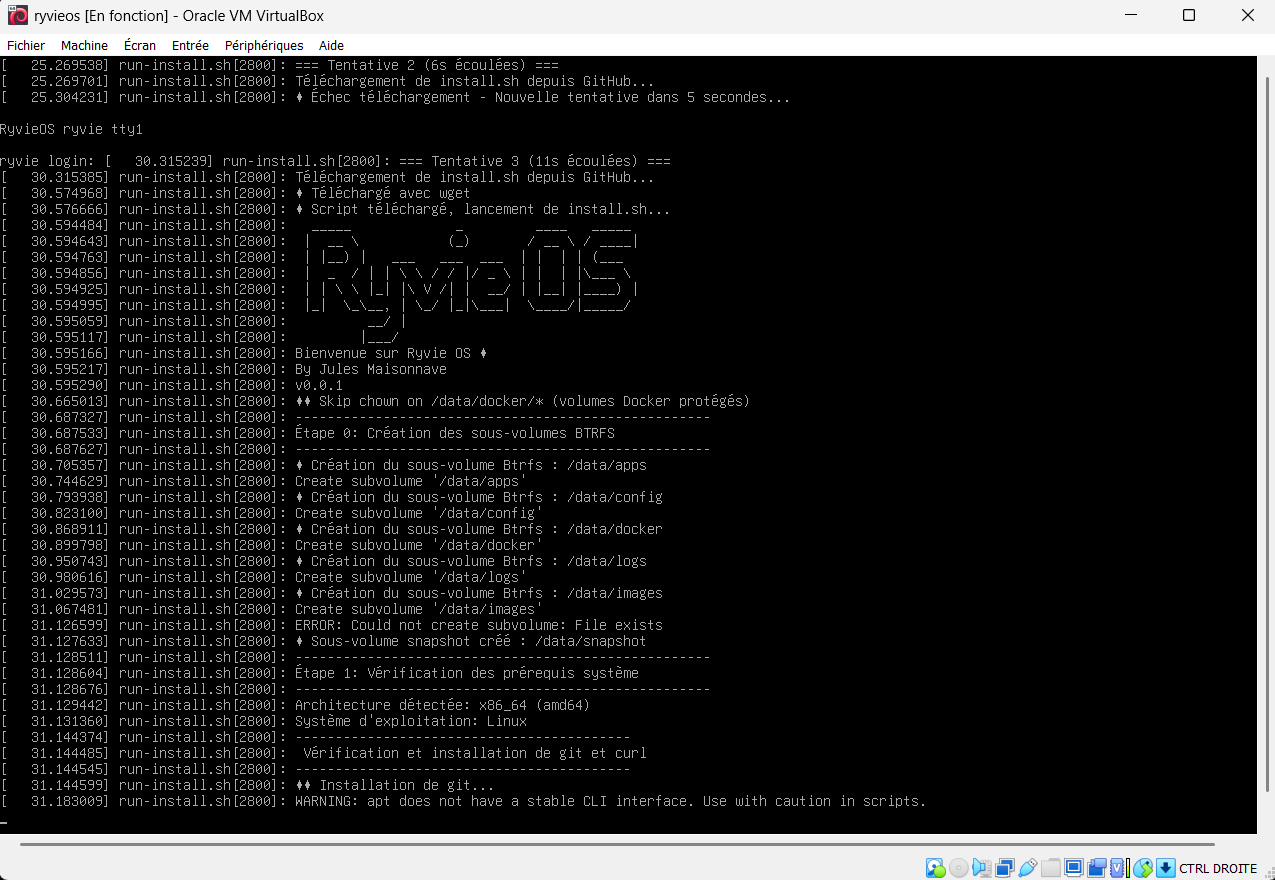
⏳ This step takes about 15 to 20 minutes depending on your internet connection. Don't close the VM during installation.
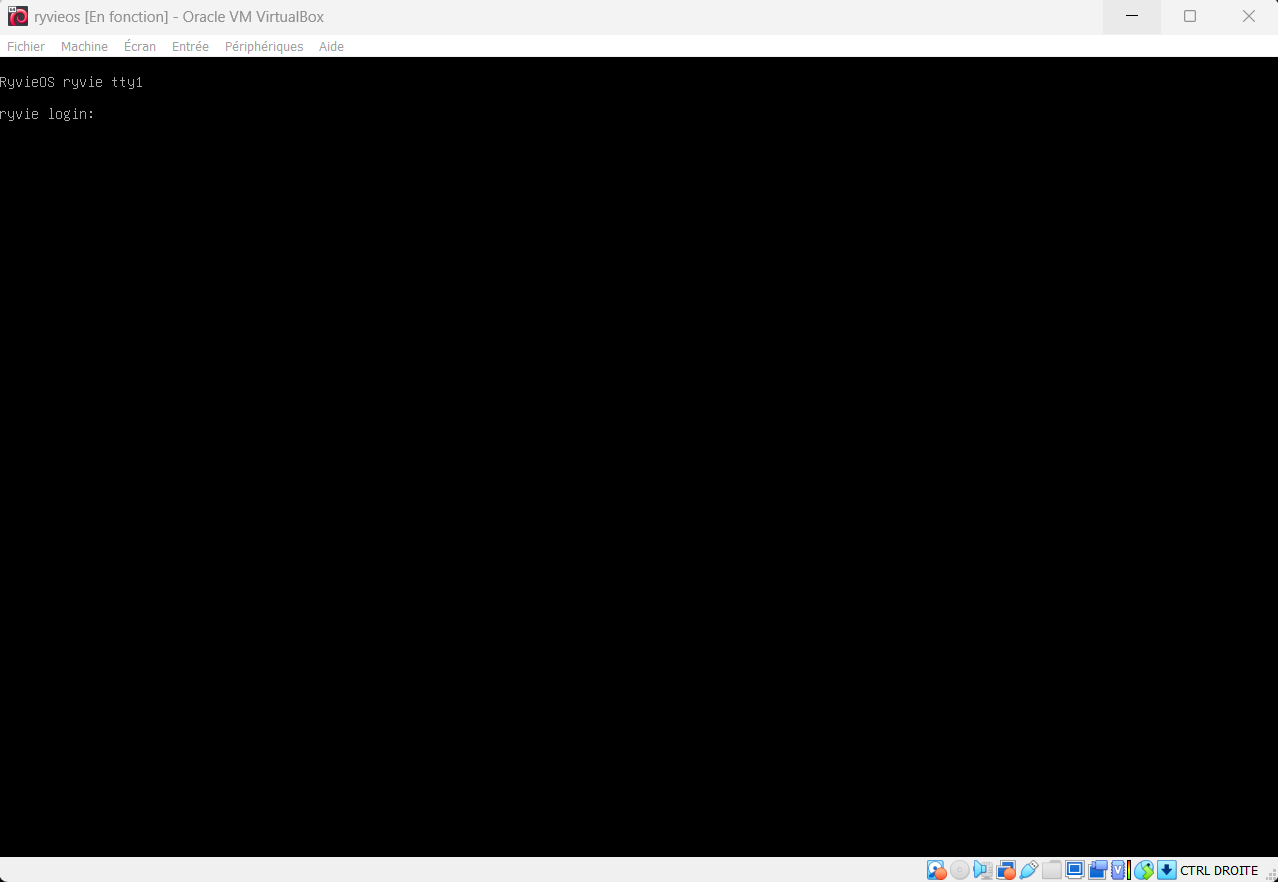
The installation is complete when you see the login screen RyvieOS ryvie tty1:
Connect with Ryvie Connect
Your RyvieOS server is now up and running! To access it, download the Ryvie Connect app on your computer.
Open the app, create an account and log in. The app will automatically detect your Ryvie server on the local network.
Installation complete!
Your Ryvie personal cloud is ready to use. Enjoy your data, at home.